Showing posts with label camera selection. Show all posts

Wednesday, 3 December 2014

Why Do My Fireworks Pictures Look So Crappy?

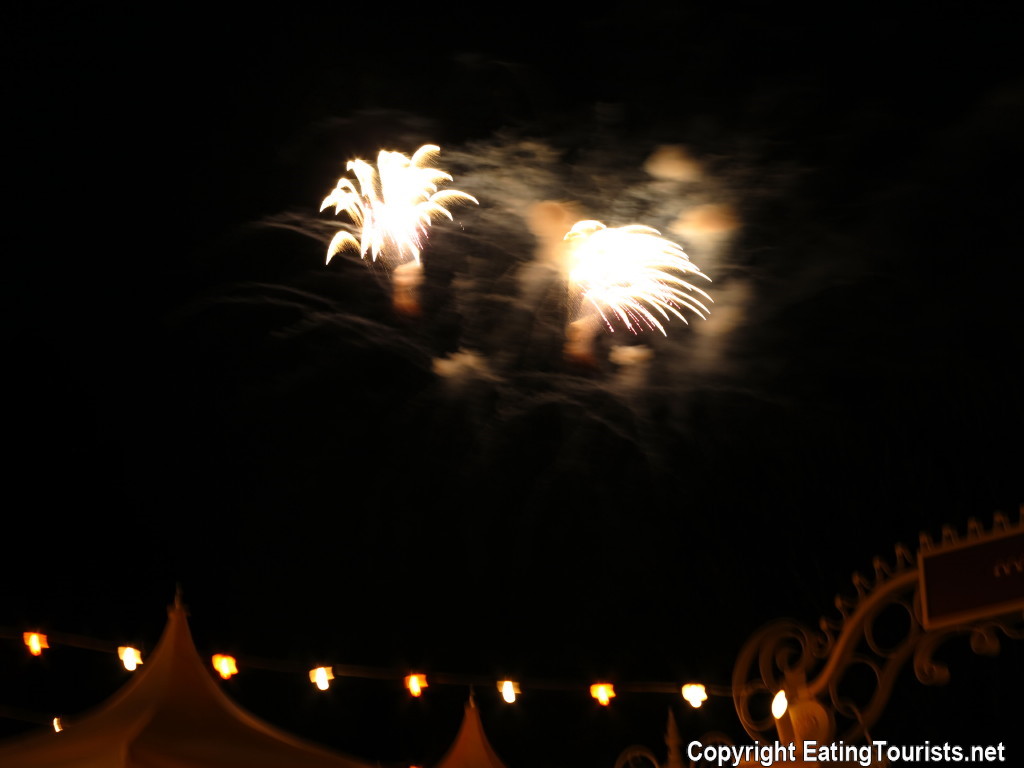
If you've ever been at a major fireworks display, perhaps on the 4th of July, or any night at Disneyland, you've probably been surrounded by hopeful tourists snapping away with their cameras. Many might even have the flash turned on. (It's dark right? So I need the flash...right? Ummm...wrong). These people are all doomed to fail in their efforts to capture pictures of fireworks that will do them any kind of justice, and they'll usually end up with something that looks like this:

Not What You Were Hoping For
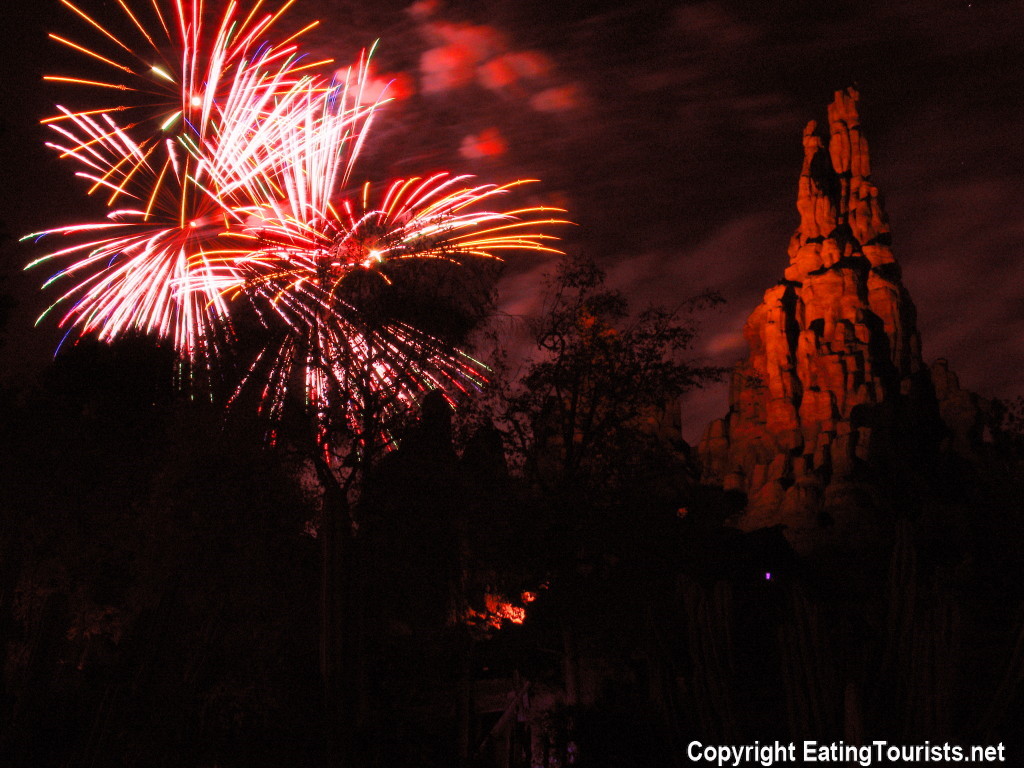
Part of this is a failure to understand just why fireworks look so great in person, but so lousy in point-and-shoot vacation snapshots. The rest is caused by a lack of attention to the "Two T's" of fireworks photography: Time and Tripod. With just a little attention to the details, you can expect to get something more like this:

That's more like it!
So what's the trick? At any given moment during a display, there may be several different fireworks exploding overhead, and those may also be in different phases of their explosion, some just started, some fully formed, and others fading out at the end of their few seconds of sparkling life.The important words here to the budding fireworks photographer are "few seconds".

A typical modern digital camera on its "automatic setting" might have a shutter speed of around 1/8th of a second when trying to shoot fireworks photos. That means that only what is happening during that 1/8th of a second is actually recorded in the photograph. So what you end up with is a disappointing few points of light, or a fuzzy white smudge, and never the sky filled with color that you seem be seeing as you watch. However, if the camera is set to keep the shutter open for 5, or 15, or even 60 seconds, then everything that happens during that time is recorded in the photo. A great deal happens in 15 seconds during a well timed professional fireworks display, and not surprisingly, a photo that records all of it in a single image can be pretty impressive. (The photo above was taken using a 6 second exposure).

As we wrote in an earlier post, it's in a situation like this that knowing some of the basic principles of photography really helps out. While it's difficult to give any specific instructions because of the huge variety of cameras out there, there are certainly a few general guidelines that will apply to most. If your camera has a "manual" setting, you'll want to use that, as it will give you complete control over the features that will ensure a great series of fireworks photos. If not, many cameras have a "fireworks" setting that will automatically set a slow shutter speed of several seconds, which is not a perfect solution but better than nothing.

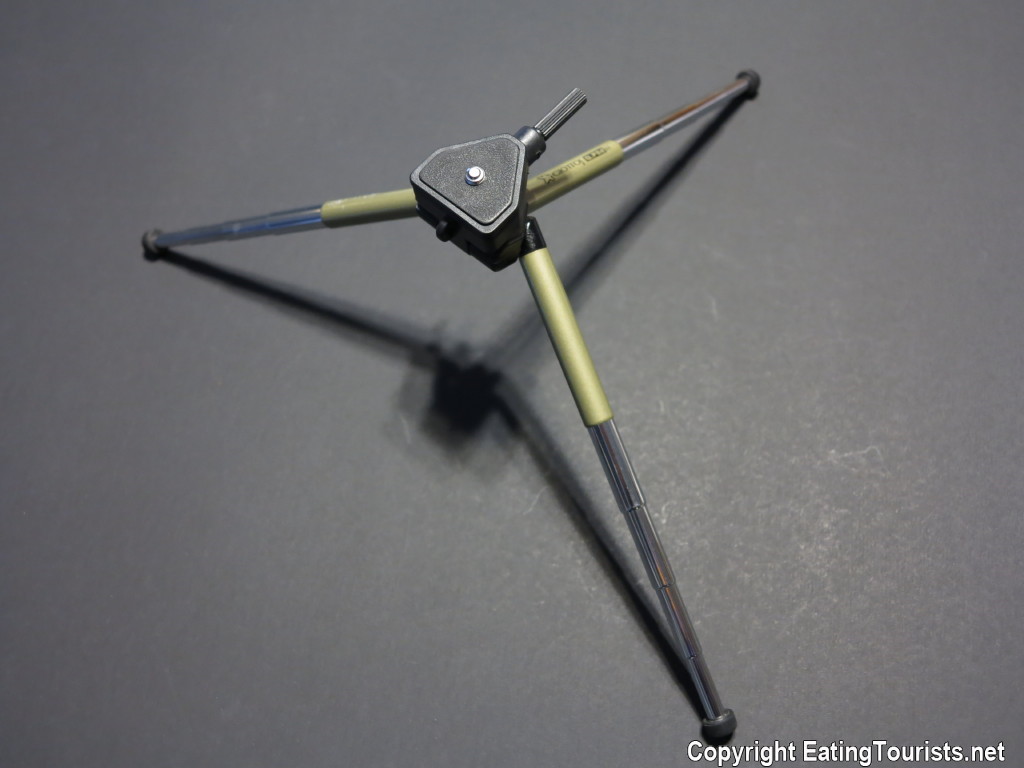
Since we need to keep the shutter open for many seconds, we're going to need a tripod, either a real one or a makeshift tripod. (Sorry, there's just no getting around it). It's simply impossible to hand-hold the camera steadily enough for any shutter speed longer than about 1/4th of a second. The good news is that there are many practical options to solve this problem. There are traditional tripods that are extremely small and light, some even small enough to fit inside a backpack with ease.

Only 15 Inches Long & 24 Ounces In Weight
But these will still open up to almost the same size as a full-on "pro" tripod:


But perhaps more importantly, there is a range of tiny travel tripods that can be pressed into service by placing them on the ground, or on top of a nearby object like a trash bin or a fence post, and some that even have bendy, gripper legs, that can be wrapped around a handy pole or traffic sign. Vicky and I carry two of the little ones whenever we travel. (My favorite is the tiny, light, and very sturdy Q-Pod seen below on the right). In a pinch, the camera can simply be propped up on any acceptable surface and rested on something like a folded up jacket to steady and support it. Anything will do, as long as the camera doesn't move while the shutter is open to take a photo.
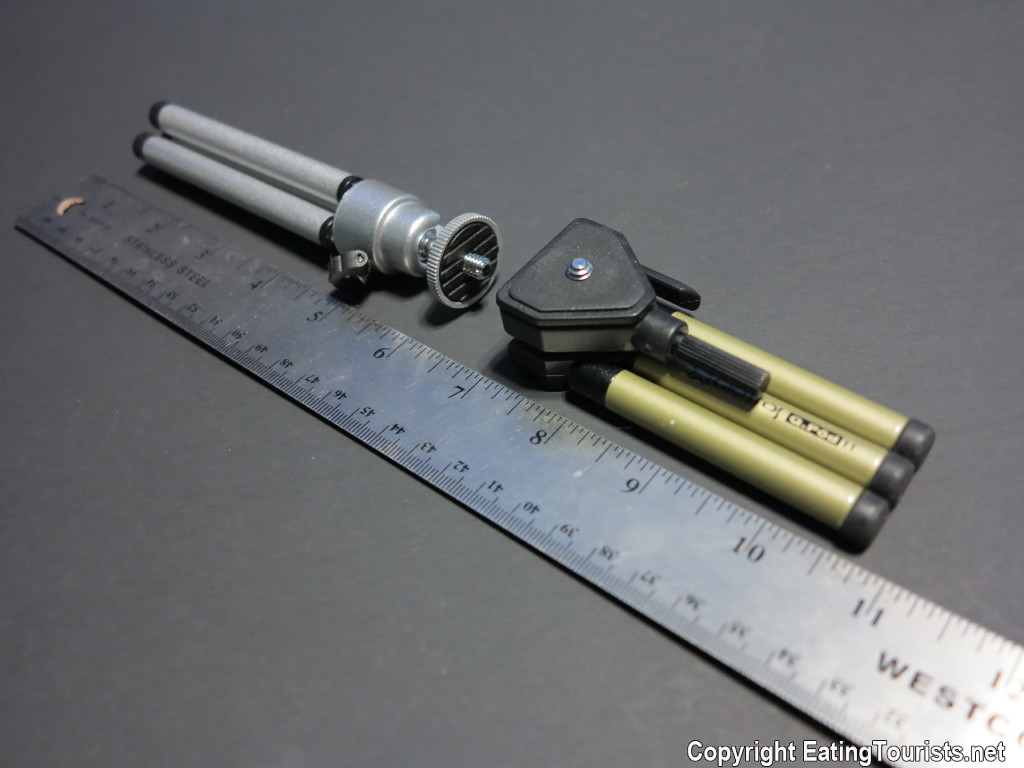
Tiny Travel Tripods (folded)
Open Q-Pod - Gives BIG performance
OK, the hard part is over. Now all we have to do is fine tune the amount of light that gets into the camera during the exposure. There are several ways to do this. With a long exposure time of this sort, we need to keep the ISO setting low. An ISO of 100 or 200 will do fine in most cases. (All cameras will allow you to control this). It's also wise to set your aperture as small as possible as well. (You might need a manual setting for this one). Both these things help to prevent your photo from being overexposed due to the very slow shutter speeds. An overexposed fireworks photo will rob the picture of its color, and everything might appear white. Most important by far though is setting the length of the time for the shutter to stay open. This depends a great deal on how "vigorous" the display is. A slow display may need 60 seconds, while a very rapid fire one may need only 3 or 4. The 4th Of July photo (below) needed a 60 second exposure because the firing rate of the show was very slow paced, while the faster paced Disneyland display (2nd photo below) took only 4 seconds to capture).

Slow Show! What you see recorded in this photo took 60 seconds to happen
Fast Show! This photo took only 4 seconds to capture.
This is where digital photography really pays off, since you can see the results of each attempt instantly, and then adjust the settings before the next one.

Lastly, we have to be sure not to move the camera at all when we release the shutter. This means (as with any tripod photography) that we can't actually push the shutter release button manually like we usually do. We'll either need to have a wireless shutter release, or simply use the timer that's already built into most cameras. The timer option is the easiest and least expensive, and all you'll need to do is choose the "2 second" option so that the shutter releases 2 seconds AFTER you push the button. This prevents the inevitable jiggle caused by touching the camera from being recorded as fuzziness on the final image.

Now that you're armed with the basics, you can prepare for your next night of fireworks and come home with pictures that do the show justice. Just take a little time to learn the basic controls on your camera, grab your tripod, and have fun!

Fox & Vicky

Sunday, 17 August 2014

The Best Camera For Travel Photography

Today we'll take a brief photo tour of Alaska, and on the way we'll have a first look at the best camera for travel photography.

Canada Place - Vancouver, British Columbia, Canada - The Gateway To Alaska
One of the comments that I see over and over again on photography blogs is the one in which a reader asks what kind of camera the photographer uses, on the premise that they'd like to buy one so that they can be a great photographer too. Hmmm...see the problem here? It's a rare casual photographer indeed that is actually being held back -- creatively speaking -- by his or her camera.

Harbor - Ketchican, Alaska
At the very beginning of my time as an underwater videographer, I sought out an experienced diver that made underwater films. I asked if he could give me any advice, and he said, "Try to hold the camera steady". I thought he was just being an arrogant jerk, and blowing me off with a flippant bit of obvious advice. It was only much later that I learned that holding the camera steady was one of the most difficult and important aspects of shooting underwater video. Without that skill (and it's not easy in the dynamic and dangerous environment that exists 120 feet underwater) your raw video is all garbage, and no amount of post production and editing will save it.

"Rough Cinquefoil" - Downtown Ketchican, Alaska
What he really meant by, "Hold the camera steady", was that I needed to start at the beginning and learn the basic skills first. I was talking to my friend Michael the other day about cameras. Michael is keen to become a better photographer, and his mentor is guiding him to learn the skills in the best possible way. He suggested that Michael use his camera only on the fully manual setting until he learns how aperture, shutter speed, and exposure control influence his photographs.

Mendenhall Glacier - Near Juneau, Alaska
Michael isn't worrying about post production techniques in Photoshop yet. He's learning how to shoot high quality photographs first. This is not how most people go about it, but it is the right way to learn, and it's working. Michael's photos show real promise, and an understanding of technique that most people may never realize.

Diamond Princess - In Port, Skagway, Alaska
Regarding the choice of equipment for travel photography, my sincere conviction is that the best camera to have is the one you've got with you.

Tulips - Jewell Garden, Skagway, Alaska
Which is to say that a camera that's easy to carry all the time is better than a huge Digital SLR with five different lenses (in a camera bag the size of an airline carry-on) that you can't be bothered to lug around.

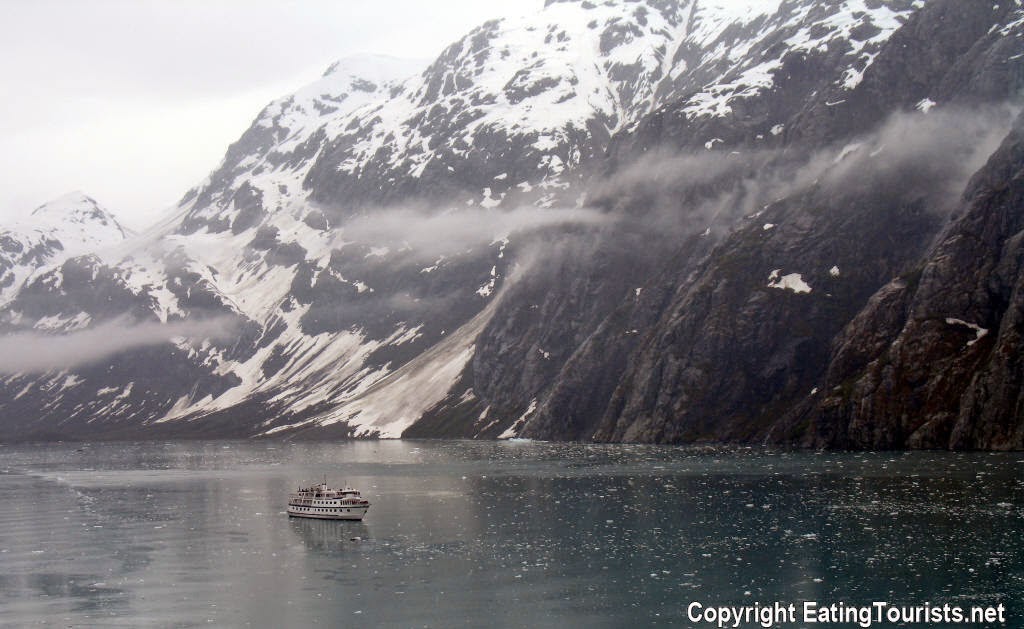
Sightseeing Ship - Glacier Bay, Alaska
So you're probably already using a camera that is more than good enough, and that's easy to carry. A good photographer can make even the most basic point and shoot camera sit up, beg, and roll over, and that's because he or she understands the principles of photography.

Magnificent Marjorie Glacier - Glacier Bay, Alaska
If you want to improve, most people will get ten times the benefit from a $30 book about basic photography than they'll get from $3000 worth of new camera equipment. So in end, the "best camera for travel photography" is almost certainly the one you're already using.

The Awesome Beauty Of The 49th State - Glacier Bay, Alaska
We'll revisit Alaska again in later posts (we've traveled there six times, and it's a favorite subject for Vicky and me) and we'll cover some of the basic principles of good photography then, so you can get the most out of the camera you already have.

Dusk At Midnight - Near Whittier, Alaska
Note that none of these photographs of Alaska were shot with a DSLR camera. All were taken with a point and shoot.

Fox & Vicky