Showing posts with label travel tips and tricks. Show all posts

Sunday, 18 January 2015

How I Got The Best Travel Computer EVER & Found True Happiness

As I mentioned in an earlier post, I have a very specific set of needs for a computer when I travel, and they're best served by a small, proper PC, that I can use in the hotel room for about 30 minutes per day. Years ago I hauled around a full sized laptop and I hated it, so I was thrilled to hear about the pint-sized "netbooks" (miniature laptops with limited features that were introduced in about 2007) and I finally got my first one in 2009.

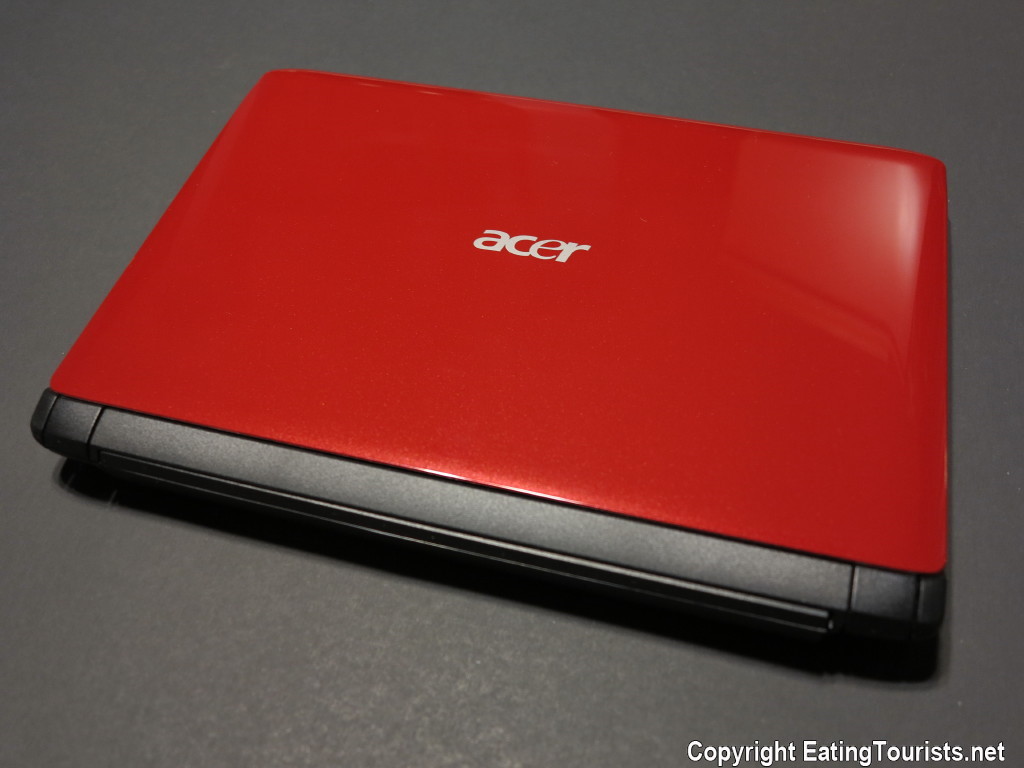
My 10.1" Acer Netbook
I bought an ACER netbook that perfectly suited my needs. Though slower than my laptop, it offered the right features, ran my beloved Windows XP operating system (OS), and was insanely small and light compared to my laptop. It had a beautiful screen, a very small travel charger, a nice keyboard, 3 USB ports, and separate microphone and headphone jacks. Oh...and it was red...which was cool. Sigh...finally, my perfect travel computer.
Remember when mobile devices had keyboards?
Of course it lasted all of three months before it died. (Yeah, I know what you're thinking. "Acer" is Korean for "junk cobbled together from 3rd party suppliers"). Undaunted, I replaced it, but with an Asus brand netbook that was not nearly as nice, but that had the benefit of actually working (for six years so far, and it's still going strong). The Asus also ran Windows XP, and that was what eventually became a problem...

I was horrified when Microsoft yanked all support for XP and I really tried to tough it out despite the dearth of security updates, but eventually my computer started acting weirder than I cared for and I had to face facts. I was thus ultimately forced to deal with replacing all my computers, and this gave me the perfect opportunity to attempt to resurrect my dream travel computer: the long dead Acer.

Now before we get into this, I can guess what you want to ask: Why didn't I just go out and buy a modern miniature laptop, and be done with it? Why go through all the incredible hassle and expense to resurrect a dead antique netbook?

Well for one thing, I really hate to lose, and the dead but otherwise perfect Acer netbook had been galling me for five years...and oh yeah... also because of happiness. Happiness you ask? What does that have to do with smashing your head against a wall and spending 200 bucks to bring a dead vintage netbook back to life?

Well, it's very simple: Happiness comes from being in a state of “Flow.”

To make a great book short, the author Mihaly Csikszentmihalyi (pronounced: chick-SENT-me-high) wrote a scholarly assessment of where exactly it is that happiness comes from, and it comes from “flow.” (See this link for his book "Finding Flow" which I highly recommend). ”Flow” is his term for the condition of being fully engaged with an activity that presents a challenge. After decades of research to determine what it is that people do that produces lasting happiness, he discovered the following: First he found that people were almost universally happy while eating, having sex, and watching movies. No surprises there, but those are all comparatively fleeting activities in the grand scheme of things and tough to keep up all day every day. So other than the “Big Three”, what made for lasting happiness? What he found was that lasting happiness resulted from facing a significant challenge with a level of skill well matched to that challenge, and then receiving feedback regarding one's success. This challenge did not have to take the form of a paid occupation or job, but he found that for many it often did. That is to say that the only thing in the lives of many people that gave them any kind of regular dose of the “happiness triangle" of "challenge-skill-feedback" was their occupation. This was ironic, because most people think that if they could only win the lottery and quit their jobs, they'd be happy. (This is unlikely, because there is no challenge at all in being rich and doing nothing).

Even though it's often an occupation that brings the only real lasting source of happiness into people's lives, it could also be a hobby, like painting or photography, or maybe even rock climbing. As long as the challenge and skill are well matched. (If it's too easy, it's not satisfying, and if it's too hard, it's stress inducing). To be in a "state of flow" (fully engaged in a task that is being met with just the right level of skill - what sports-people often refer to as being "in the zone") is where real lasting happiness comes from. Finally, there needs to be some sort of feedback as a measure of success. Perhaps the painter sells a painting at a craft fair, the photographer gets online kudos from posting pics to a blog, the rock climber makes it to the top of a challenging cliff, and even the worker at his job might get a raise, or at least a pat on the back. The glow you carry with you from these accomplishments is with you every minute of every day. True lasting happiness.

So the long answer to the short question is: I chose to rebuild the antique netbook because it was more challenging than buying a new one, and would therefore make me happy...and it worked! I had more fun than a barrel of monkeys, even though (really because) it was at the very limits of my abilities. I'm no computer guy, and it took everything I had to pull this off.

So the next time you're unhappy, and looking for a lasting cure, look around for a real challenge. The happiness is right there, just waiting for you to come and get it.

WARNING! - Read on for the picky details of the netbook resurrection project ONLY if you meet one of the following conditions:

A) You REALLY love computers.
or
B) You are an insomniac in need of a powerful sleep aid.

Still here? OK then. I started the netbook rebuild from the assumption that the netbook was dead as the result of a bum hard drive (Hitachi 160GB 5400 RPM SATA II that had been killed -- like so many other electronics -- by the conditions in Mexico. This stuff was just never meant to work at 95% humidity). So I decided that I'd be best served by first replacing it with a solid state drive (SSD) and I chose the Samsung 840EVO 120GB. At the time I was unaware of the algorithm problem with this drive that produced very low read speeds on older data, but fortunately the firmware revision fix was issued by Samsung (download here) right about the same time that I bought the drive and all ended well. (It looks like the Samsung 850 Pro may have overcome these concerns, and it would be my new choice if I had it all to do over again).

Second, I needed to decide on an OS, and it seemed that Windows 7 Pro was the obvious choice. I knew that this netbook (called an Aspire One but more properly the Acer NAV50) had been available with Windows 7 Starter 32bit (despite my preference at the time for XP) so I set out to locate a copy of Windows 7 Pro 32 bit, reasoning that it would be likely to work and that the drivers for it would still be available on the Acer website. It turned out that finding a legitimate clean copy of the OS was not easy, and so I turned to my friend Trevor at Qwerty Computers for help. He directed me to techverse for a clean ISO file download, but asked why I wanted to go with the 32 bit version. It seemed obvious to me, since the netbook had never been sold with a 64 bit OS, but he convinced me to aim high and try to install Windows 7 Pro 64 bit, and damned if it didn't work! Now I was looking at a super clean (bloatware free) install of Windows 7 Pro 64 bit on a screaming fast SSD. So far so good.

I jumped through some crazy hoops to create a bootable USB flash drive from which to install the OS, since I knew that if I ever had a catastrophic failure while travelling, I could (if necessary) exercise the “nuclear option” and re-install the OS from scratch, and then restore the SSD from a system image file on my travel external backup HD, and I'd be back in action. Then I tracked down a 2GB stick of RAM to double the available memory (sadly 2 GB is the limit here) and I was ready to start updating the OS, and installing software. I was stymied by the fact that there were no 64 bit drivers available from Acer for this machine, so I crossed my fingers and hoped that Windows would come to the rescue. Say what you will about Microsoft, their stuff works, and sure enough, every single driver that mattered to me came down the pipe with the 120 or so Windows 7 Pro updates that I needed to install. (Note: If you are running Windows 7 of any type, be sure to take advantage of some very useful fallout from Windows 8.1, and install the Disk Cleanup Wizard add-on that is now available. This update allows you to remove all the superseded (and useless) updates that have piled up on your SP1 version Windows 7. Dramatic speed improvements will be the norm after you install and run it).

Next I installed the single most important piece of 3rd party software in existence (in my humble opinion) -- the truly awesome “Classic Shell.” Classic Shell overcomes pretty much every mistake that Microsoft has made in “improving” the interface of their post-XP offerings, and in short order I had 7 Pro looking and acting like Windows 2000 Pro (maybe the best Windows OS ever). Then after a failed flirtation with installing Chrome 64 bit as a browser (it does not yet work with Google Talk, which is indispensable to me on the road) I went back to Chrome 32 bit. Top of the line anti-virus, and anti-malware software were next, followed by a string of tests and performance tweaks to wring every single ounce of speed out of the venerable architecture that I had to work with. I minimized the start-up items, disabled services by the dozen, and reduced graphics intensive features to zero. I also installed and enabled the incredible Rapid Mode software from Samsung that produces sequential read speeds in excess of 440 MB/s, and set up an 11GB “over-provisioning” partition on the SSD. Then there were the registry hacks to increase the available resolution of the monitor, and disable the super-fetch and prefetch features as required for SSDs. I also enabled “click to play” in Chrome, which cuts down dramatically on graphics-heavy ad material. This is to say nothing of disabling system restore and the defragmentation function (both SSD issues). In the end the machine sports a 25 second boot to desktop time.

Finally, I swapped out the enormous and heavy 9 cell battery and replaced it with a new slim and lightweight 3 cell battery. This provides more than enough power for my needs, especially with the vastly decreased power needs of the moving-parts-free solid state drive, and dropped the final weight of the netbook to about two pounds. Final outside dimensions are 10” x 7” x 0.8” making it one of the smallest “notebooks” available.

I should mention here that I saw someone using what I thought was the world's smallest notebook computer one day at a Starbucks. I had to ask what it was, and it turned out to actually be an iPad mini wearing a Zagg keyboard. If I didn't prefer PCs over Apple products as much as I do, I would have seriously considered this option. (On a side note, I think that tablets have ultimately failed as an exercise in computer design. I see so many aftermarket products designed to let the tablet user replace the missing keyboard and case, and thus end up with what is really just an expensive homemade netbook).

So let's get to the bottom line here and determine what really constitutes the BEST travel computer. I was discussing this whole project with a friend, and I pronounced my hot-rodded vintage netbook the ultimate travel computer. He said that I was wrong, and that the Microsoft Surface Pro 3 was better. I looked into it, and he was right. It's a LOT better, but in its fullest “racecar” configuration, it's also about $2200. So I still give my old Acer the win on travel-computing-muscle-per-dollar, and as a bonus, it came with a heaping helping of happiness.

Fox & Vicky

Sunday, 14 December 2014

Save-A-Trip Kit: Tool Time

It's time we added some more items to your Save-A-Trip kit. Vicky and I pack some very basic tools with us on every trip, and this has paid off time and again. Here are the travel tools that we've found to be most useful. They take up almost no space at all but still manage to cover nearly every need that's come up while travelling. Most can be bought at your local dollar store if you want to avoid the big brand name versions and save a bunch of money.

What they're packin'
Let's go through them and see what we've got. First is the ubiquitous "Multi-Tool". You'll find a link to the best known version here, but mine was only a buck and does the job. It features pliers (I prefer the more useful "needle nose" variety) wrenches, knife, saw, ruler, all manner of screwdriver attachments, bottle opener, and an old-style can-opener. (This last item is a must-have, so look for that on the version you choose). I add a sturdy pair of tweezers and a very fine jeweler's type screwdriver for completeness.

Next is the "Swiss-Card" tool kit. (OK, this one is the real deal, but inexpensive knockoffs are readily available). It covers a range of very fine tools like delicate tweezers and scissors, a pin for removing slivers, a file, a toothpick, and even a very tiny ballpoint pen. It fits easily inside a wallet and is about the size of a fat credit card.

Then we have our Sommelier-style corkscrew (with bottle opener, and cap cutter). I know this might be overkill, and there are likely smaller options, but we open LOTS of wine, so the smooth and easy operation of this type of corkscrew is worth it, and it was also only a buck.

Lastly (and perhaps another little extravagance) is my beloved "Pocket Ulu" knife. (If you visit Alaska and leave without an Ulu knife of some kind, you did it wrong). It's small enough for fine cutting jobs, yet extremely sturdy, and strong enough for very heavy cutting jobs. I've even used it as a steak knife, or to slice some hard cheese in the hotel room to go with all that wine we opened earlier with our Sommelier corkscrew.

How they pack
Like all the other save-a-trip items we've covered so far, the range of potential uses for these tools far exceeds those they were originally intended for, and is limited only by your imagination and immediate needs. More importantly, they bear the precious gift of time, by allowing you to solve a travel problem quickly and without unduly cutting into your vacation experience.

Remember: "Good trips happen before you leave."


Fox & Vicky

Wednesday, 3 December 2014

Why Do My Fireworks Pictures Look So Crappy?

If you've ever been at a major fireworks display, perhaps on the 4th of July, or any night at Disneyland, you've probably been surrounded by hopeful tourists snapping away with their cameras. Many might even have the flash turned on. (It's dark right? So I need the flash...right? Ummm...wrong). These people are all doomed to fail in their efforts to capture pictures of fireworks that will do them any kind of justice, and they'll usually end up with something that looks like this:

Not What You Were Hoping For
Part of this is a failure to understand just why fireworks look so great in person, but so lousy in point-and-shoot vacation snapshots. The rest is caused by a lack of attention to the "Two T's" of fireworks photography: Time and Tripod. With just a little attention to the details, you can expect to get something more like this:

That's more like it!
So what's the trick? At any given moment during a display, there may be several different fireworks exploding overhead, and those may also be in different phases of their explosion, some just started, some fully formed, and others fading out at the end of their few seconds of sparkling life.The important words here to the budding fireworks photographer are "few seconds".

A typical modern digital camera on its "automatic setting" might have a shutter speed of around 1/8th of a second when trying to shoot fireworks photos. That means that only what is happening during that 1/8th of a second is actually recorded in the photograph. So what you end up with is a disappointing few points of light, or a fuzzy white smudge, and never the sky filled with color that you seem be seeing as you watch. However, if the camera is set to keep the shutter open for 5, or 15, or even 60 seconds, then everything that happens during that time is recorded in the photo. A great deal happens in 15 seconds during a well timed professional fireworks display, and not surprisingly, a photo that records all of it in a single image can be pretty impressive. (The photo above was taken using a 6 second exposure).

As we wrote in an earlier post, it's in a situation like this that knowing some of the basic principles of photography really helps out. While it's difficult to give any specific instructions because of the huge variety of cameras out there, there are certainly a few general guidelines that will apply to most. If your camera has a "manual" setting, you'll want to use that, as it will give you complete control over the features that will ensure a great series of fireworks photos. If not, many cameras have a "fireworks" setting that will automatically set a slow shutter speed of several seconds, which is not a perfect solution but better than nothing.

Since we need to keep the shutter open for many seconds, we're going to need a tripod, either a real one or a makeshift tripod. (Sorry, there's just no getting around it). It's simply impossible to hand-hold the camera steadily enough for any shutter speed longer than about 1/4th of a second. The good news is that there are many practical options to solve this problem. There are traditional tripods that are extremely small and light, some even small enough to fit inside a backpack with ease.

Only 15 Inches Long & 24 Ounces In Weight
But these will still open up to almost the same size as a full-on "pro" tripod:


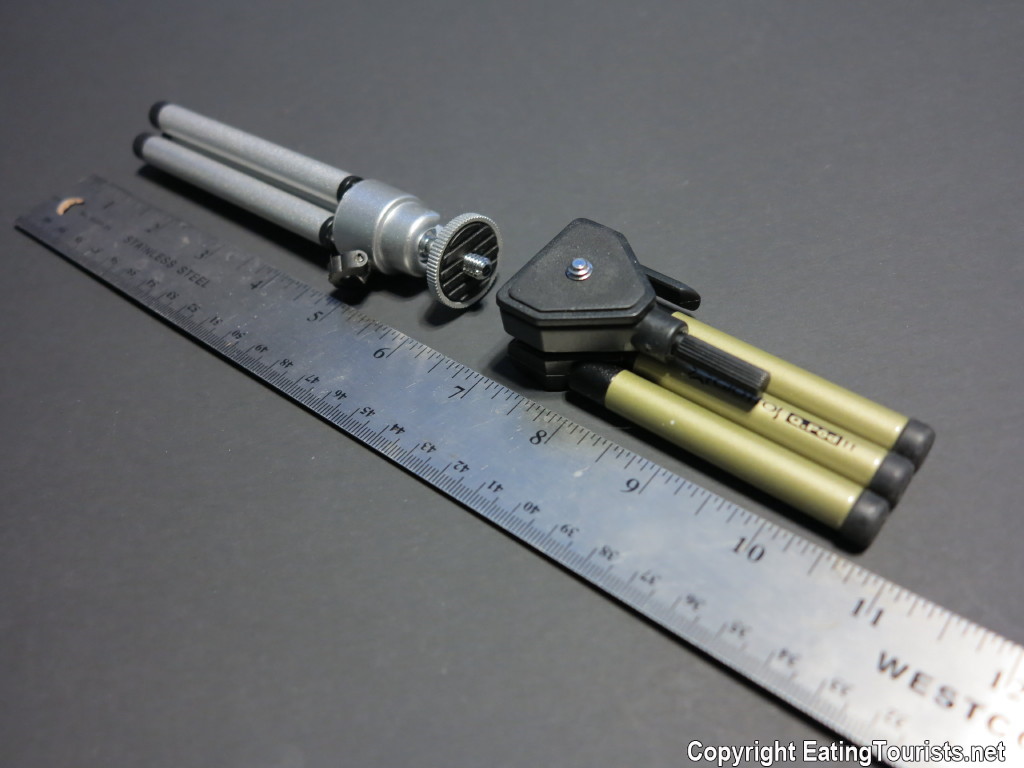
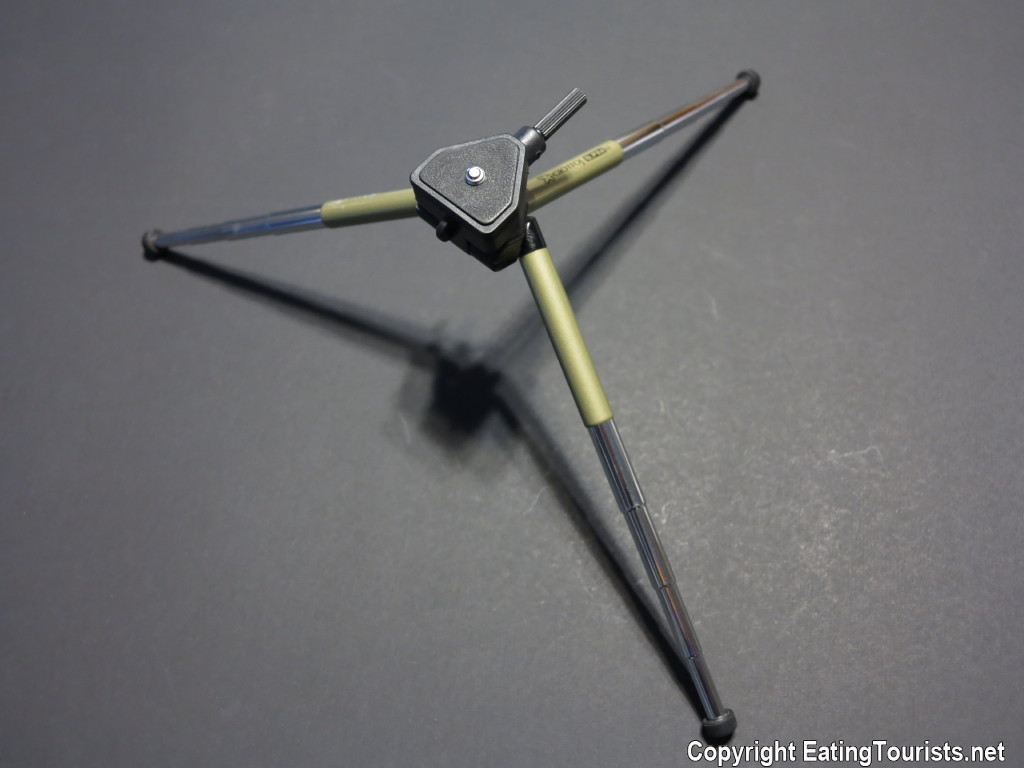
But perhaps more importantly, there is a range of tiny travel tripods that can be pressed into service by placing them on the ground, or on top of a nearby object like a trash bin or a fence post, and some that even have bendy, gripper legs, that can be wrapped around a handy pole or traffic sign. Vicky and I carry two of the little ones whenever we travel. (My favorite is the tiny, light, and very sturdy Q-Pod seen below on the right). In a pinch, the camera can simply be propped up on any acceptable surface and rested on something like a folded up jacket to steady and support it. Anything will do, as long as the camera doesn't move while the shutter is open to take a photo.

Tiny Travel Tripods (folded)
Open Q-Pod - Gives BIG performance
OK, the hard part is over. Now all we have to do is fine tune the amount of light that gets into the camera during the exposure. There are several ways to do this. With a long exposure time of this sort, we need to keep the ISO setting low. An ISO of 100 or 200 will do fine in most cases. (All cameras will allow you to control this). It's also wise to set your aperture as small as possible as well. (You might need a manual setting for this one). Both these things help to prevent your photo from being overexposed due to the very slow shutter speeds. An overexposed fireworks photo will rob the picture of its color, and everything might appear white. Most important by far though is setting the length of the time for the shutter to stay open. This depends a great deal on how "vigorous" the display is. A slow display may need 60 seconds, while a very rapid fire one may need only 3 or 4. The 4th Of July photo (below) needed a 60 second exposure because the firing rate of the show was very slow paced, while the faster paced Disneyland display (2nd photo below) took only 4 seconds to capture).

Slow Show! What you see recorded in this photo took 60 seconds to happen
Fast Show! This photo took only 4 seconds to capture.
This is where digital photography really pays off, since you can see the results of each attempt instantly, and then adjust the settings before the next one.

Lastly, we have to be sure not to move the camera at all when we release the shutter. This means (as with any tripod photography) that we can't actually push the shutter release button manually like we usually do. We'll either need to have a wireless shutter release, or simply use the timer that's already built into most cameras. The timer option is the easiest and least expensive, and all you'll need to do is choose the "2 second" option so that the shutter releases 2 seconds AFTER you push the button. This prevents the inevitable jiggle caused by touching the camera from being recorded as fuzziness on the final image.

Now that you're armed with the basics, you can prepare for your next night of fireworks and come home with pictures that do the show justice. Just take a little time to learn the basic controls on your camera, grab your tripod, and have fun!

Fox & Vicky

Sunday, 5 October 2014

The End Of Travel Wi-Fi Problems!

Aren't modern wireless Internet communications just the BEST!

If you think that, then you probably aren't travelling much. There are a ton of problems with using Wi-Fi on the road, and I'm actually happiest when I find a proper hardwired LAN port at the desk in any hotel room we're staying in. That way I can just plug my laptop into the wall jack with my retracting travel LAN cable, and I'm good to go, with what is usually a bulletproof Internet connection, and much better security.

Retractable Travel LAN Cable - Great When There's A Jack...
But that almost never happens these days, so I'm usually stuck with the hotel's Wi-Fi signal, which is often almost too weak to use. On a recent cruise, we had the misfortune to be a little too far from the ship's public Wi-Fi router down the hall from our room, and the steel door of the cabin almost entirely blocked what little signal there was. I had to set up a table near the door, which I propped open with a beach towel in order to get any Wi-Fi access at all.

One Version Of A Travel Wi-Fi "Signal Booster" Router
Then I stumbled on the answer to all my travel Internet problems, the portable Wi-Fi signal booster. These are readily available from many makers and can be had for as little as $12. I bought mine on eBay, but the menus on this one are all in Chinese, so I don't recommend this particular model to the average user. (It was NOT easy to figure out, but I actually recognize a few Chinese characters now).

Yours will be in English though, and while they're definitely not for everybody (some experience with computers would be helpful as they are by no means a plug-and-play device) I now consider it a must-have travel item.

NOTE: If you don't like tinkering around with your PC, don't know what an IP address is, have never heard of an SSID, or have never changed a setting in "Network Connections" on your computer, just pretend that the rest of this post reads; "Blah blah Computer Nerd blah blah" and skip it entirely to read the next one. You will probably just hate having a travel router :)

Still reading? OK then! In general -- and once only on arrival at any given location -- one sets up the travel router to repeat the Wi-Fi signal that you want to use. This can be done via a wireless connection, but it is much better to use a direct LAN cable connection between the travel router and a Laptop or Netbook PC. Then all your wireless devices can log-on to the now much closer and much stronger signal coming from your booster. In this case, the user-name and password are the same as that used for the regular hotel Wi-Fi, and your device will not know the difference. The problem with this "repeater" set-up is that the person staying in the next room will also be able to log on to your travel router, since it uses the same user-name and password and will have the strongest available signal.

Fortunately most of these travel routers are actually every bit as full featured as your router at home, so with an extra step you can set up your travel router as a "bridge" instead of as a "repeater".  A bridge takes the Wi-Fi signal you want to use and re-broadcasts it under a different name (any SSID of your choosing - my personal favorite is "FBI Surveillance Van 2") with a separate secure user-name and password (also of your choosing) with which to log on. The wonder of the bridge set-up is that you now have a private Wi-Fi hotspot with a strong signal that is available only to you. Without the password, others nearby cannot log onto it, and it places your wireless device behind your own router, which offers much better security.

The version I have even features a LAN port, so that for improved security I can turn off the wireless feature of my laptop completely, and connect to the travel router directly via a LAN cable. While it's true that the communications between your travel router and the hotel's Wi-Fi router remain wireless, it is much less likely for them to be compromised than if you were on the shared wireless connection with everybody else in the hotel.

These features work for the public Wi-Fi at airports, coffee shops, etc., making the travel router very useful not just as a signal booster, but also as an extra layer of security.

Enjoy your better Internet!

Fox & Vicky

Monday, 1 September 2014

How To Rescue A Blown-Out Flip Flop

Today we'll add a new item to your growing save-a-trip kit, and at the same time make good on our earlier promise to show you a handy trick to fix a blown-out flip flop.

A simple plastic bread bag tab will temporarily get a broken flip-flop back into service so you can finish your day in peace at the beach or pool without having to run out and buy another pair.

Small item - Big save
Usually the problem happens when one of the rubber plugs that attach the straps to the sole of the shoe tears through the bottom.

Nothing to it.
Simply snapping the bread bag tab over the rubber plug in question will keep it from pulling through again.

Back in business!
Throw a few of these into your plastic zipper bag with your other save-a-trip items. Have fun, and remember that, "good trips happen before you leave".

Fox & Vicky